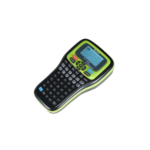


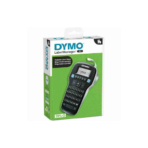
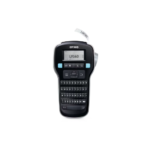
DYMO Label Manager 160P Label Maker
Key Features
Brand-DYMO
Portable handheld design for mobility
Thermal printing without ink cartridges
Supports 6-12mm DYMO D1 tapes
7 font styles and 6 text sizes
Stores up to 9 custom labels
1 Year Warranty
DYMO LabelManager 160 Portable Label Maker Review and Setup Guide
The DYMO LabelManager 160 is a fast, portable label maker designed to organize home offices, warehouses, files, and retail spaces. Featuring a computer style keyboard layout, smart fast formatting keys, and a large visual display, this handheld device creates customized labels instantly. This comprehensive guide covers key product features, hardware specifications, and operating steps.
Premium Design and Key Features
QWERTY Computer Style Keyboard
The handheld device features a standard QWERTY character layout setup. This design mimics a computer keyboard, allowing users to type out text names, inventory numbers, and descriptions quickly without searching for letters on an alphabetical grid.
One Touch Smart Formatting Keys
Dedicated physical buttons sit right below the display screen to format labels instantly. Users can adjust text size, apply bold styling, change fonts to italic, underline titles, or box content with a single button press. This layout eliminates the need to navigate complex digital system menus.
Comprehensive Customization Templates
The internal software engine offers wide creative flexibility for custom organization projects. It includes six distinct font sizes, eight unique text clip styles, and four separate border boxes. A built in library features over two hundred icons, symbols, and punctuation marks to enhance label identification.
Advanced Graphical Preview Screen
The large liquid crystal screen displays your complete label design before triggering the mechanical cutter. This visual preview shows exactly how the text, clip art, and styling decorations will look on the physical tape, preventing printing mistakes and saving tape media.
Technical Specifications
Keyboard Style: Computer Layout QWERTY Keys Array
Label Width Support: 6mm, 9mm, and 12mm D1 Tape Widths
Power Requirement: Six AAA Alkaline Batteries or Optional AC Adapter
Display Screen: Large Graphical Liquid Crystal Display
Cutter Mechanism: Manual Physical Side Lever Cutter
Internal Memory: Saves Last Created Label Automatically
Font Variety: 6 Text Sizes, 8 Text Styles, 4 Borders
Step-by-Step Installation Guide
Hardware Loading and Initialization
- Press the plastic release latch on the back panel of the machine to remove the battery door casing.
- Insert six fresh AAA alkaline batteries into the open chamber slots matching the polarity marks.
- Unwrap a genuine DYMO D1 label cassette and verify the plastic text tape feeds smoothly from the guide cartridge.
- Insert the cassette firmly into the internal bay until it clicks into place.
- Thread the loose label tail through the side exit slot opening of the printer housing frame.
- Snap the rear plastic compartment cover back onto the machine chassis securely.
Creating and Printing Your First Label
- Push the bright physical Power button located on the top edge of the control face.
- Type out your desired tracking text or classification title using the QWERTY letter keys.
- Tap the Size button or Style button to modify the bold formatting or change character heights.
- Tap the Symbol button to scroll through the graphic library and add an icon if needed.
- Push the dedicated Print button to trigger the internal thermal execution engine.
- Press the large manual Cutter lever button on the upper side panel to slice your finished tape.
- Peel away the split plastic protective backing sheet to expose the adhesive and apply the label.
Frequently Asked Questions
Why is the label maker screen failing to power on after pressing the button
Ensure all six AAA batteries sit facing the correct directions inside the rear compartment slot. Mixed battery brands or combining old batteries with brand new cells can drop the voltage output below operating requirements. Clean the metal contact terminals using a dry cotton swab if battery fluid residue or dust blocks current flow.
What should I do if the text on the printed tape looks faint or shows streaks
Faint printing typically points to dropping battery charge or a dirty internal heating element block. Install a fresh set of high quality alkaline batteries to restore peak performance. If lines or streaks persist across the label surface, open the cassette bay window and wipe the tiny black thermal print head structure gently using a cotton swab dipped in pure isopropyl alcohol


Reviews
There are no reviews yet.